Showing posts with label yarn. Show all posts

Saturday, July 26, 2008

Sock KAL-The Toe and Kitchener Stitch

The last task to complete your fabulous socks is upon us. It's time to finish the toe and weave it together for a seamless and perfect ending. You've knitted down the foot until about 2" of length remain. We'll be doing a striped toe in colors B and C, so if you like more color and a longer toe, you can start the stripes well before we begin to decrease. The color stripes pattern is where the clock pattern ends so you can remove your markers.

We're going to change colors at the bottom of the foot where it won't show as much. After you knit one round in the new color, there will be a jog where the first round ends and the second round begins. To minimize this, we're going to reach down into the previous color row and pull a stitch up one row and knit it together with the first stitch of the round. It will look like a slip stitch when finished, being two rows tall. This floating stitch only occurs on the second round after the color change.

Change to color B and knit around.


At the beginning of needle #1, reach down with the tip of your right needle and pick up the right side of the stitch directly below (it will be in color A)...


and put it on your left needle without twisting it.


Knit this stitch and the first st. on #1 together. Knit around.


Change to color C and knit around. Repeat the second round as above, picking up the stitch below in the previous color and knitting it together with the first stitch on needle #1.

The stripe pattern is two rounds wide in each color, unless you want something thinner or wider. Substitute however you like. Floating the first stitch from below always happens on second round (and only the 2nd round) after the color change. If you don't care whether you have a jog in your stripes or not, knit happily around and disregard the directions for addressing this jog.

Next round: Change to color B and knit around.
Next round: Knit (floating the colors st. if you like) and decrease as follows:
#1: k to last 3 sts., k2tog, k1
#2: k1, ssk, k to last 3 sts., k2tog, k1
#3: k1, ssk, k to end.

If the toe were laying flat on the table, the decreases take place one stitch in from the edge on both sides of the toe, top and bottom, so there will be four decreases each round. It helps me to get a visual for this so I don't have to keep looking at the directions.


Next round: Change to color C and knit around.
Next round: Knit a decrease round as above, (floating the color st. if you like)

Continue striping and decreasing on every other round as above until 32 sts. remain, 8 on #1 and #3 each.
Work a decrease round on every round until 16 sts. remain.
Using needle #3, knit across the sts. on needle #1 so that the remaining sts. are held on 2 needles only with 8 on each.
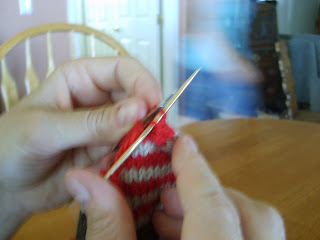
The join with the floated stitch is visible in the photo above, but once it's blocked, it will be much less visible.

Kitchener Stitch

We'll finish the toe by weaving the stitches together using a technique called Kitchener Stitch. I don't know how it got it's title. Basically, Kitchener Stitch reproduces the knit stitches, creating what looks like a continuous knit fabric. There are no seams and it looks for all the world like the knitter knit the toe from back to front without stopping. It's brilliant and very useful in all kinds of garments. Here's how it works:


Cut the working yarn into a long tail (18 in. or more) and thread it onto a tapestry needle. With all of the stitches held on two needles, hold the needles together, one in the front and one in the back with the working yarn tail coming from the back needle.


Set up row: Using the tapestry needle run the yarn through the first stitch in the front as if to purl. Then run the yarn through the first stitch on the back needle as if to knit. Pull snug.


Row one: Slip the first st. of the front needle onto the tapestry needle as if to knit, enter the 2nd st on front needle as if to purl, leaving it one the knitting nee both dle. Pull the yarn through stitches. Snug up yarn, but not tightly.


Slip the first st. on back needle as if to purl. Enter the 2nd st. on back needle as if to knit. Pull yarn through both sts. and snug up the yarn, but not tightly.


Row two up to last row: Repeat as above. There will be one less st. on each needle each repeat until only 2 sts. are left.

Last row: Slip front st. as to knit, slip back st. as to purl. Snug up yarn, weave in end.


Knit, purl, purl, knit. That's how I remember the order. Always slip the first st. off the needle, thread through the second, front and then back. slip knit, purl front. Slip purl, knit back. Once you get the first couple of repeats finished, it all falls into a rhythm.

Woo Hoo! the toe is finished. It may look a little rough in the picture but after blocking, it will look perfect. Now we have to go back to the cuff, sew the edges of the twisted edging together and weave in all of the ends. After that, it's done!!

Try on your sock.

Admire your handiwork.

Start on the second one if you haven't already.

Send me the pictures at woolyworks@odysseyrockranch.com along with your own story and comments or your own blog or web address. If you've got something to share, please send it along and I'll post if for you here and on our website and/or link to your site.

Finally, wear your socks proudly, present them as gifts to only the most important people in your life, or sell them on Etsy.com .

Write your own patterns and dream up your own designs.

Design new and better ways to accomplish knitting tasks.

Write a book.

Become famous!!

What a difference a Sock KAL can make!


Friday, July 18, 2008

Sock KAL-Turn the Heel, Work the Gusset OR Knit a Massive Bump on Purpose

Welcome back for more of the Wooly Works Sock Knit Along. Have you finished your cuffs? Are you ready to knit down the leg and--gasp!--turn the heel? This time we're going to really kick things into high gear, so here we go, ready or not. We left off at the end of 8 round of ribbing.

You know, if you don't like the color pattern or didn't feel up to tackling it, you could work 12-16 rounds of ribbing and call it good. You'll have a fabulously luxurious sock when you're done no matter what you do.


The next step is to knit the leg portion. This is where the bulk of the knitting happens and to make it just a little more interesting and to add some class, we're going to work a clock pattern. A clock is a small insertion that runs the length of the leg and foot and is worked at both ends of needle#2. It's usually 3-5 sts. wide and can be as simple as 3 purl sts. to break up the stocking stitch or as complex as a cable or simple lace insertion. For ours, we will do a mock cable twist with a purl stitch on each side.

To set up, knit across the sts. on needle #1. On needle #2, p1, k2, p1 and place a marker. Knit across to the last four sts., place a marker, p1, k2, p1. Knit across the sts. on needle #3.

This is the pattern for the clock:

Row 1: p1, k2, p1
Rows 2-3: Repeat row 1
Row 4: p1, k2tog but do not slip off of needle. Insert right needle tip between the 2 sts. and knit the first st. again. Slip both off of needle together. P1.
Repeat these four rows at both end of needle #2 for the length of the sock. The markers will remind you to work the pattern.

Knit on down the leg until it's the length you want it to be.

I made mine 4 inches from the bottom of the ribbing for a total length of 8" from cuff to beginning of heel flap. If you want to make knee socks, there is some shaping for the calf that needs to happen. Let me know if you need help with this.

Now you're ready to knit the heel flap. This is done back and forth on two needles and knit over 1/2 the total sts. So, knit across the sts. on needle #1 so that they're all on one needle.

Put a point protector on the ends of needle #2 or wrap a rubber band around the ends so you don't lose your sts. while you turn the heel.


Turn the work, change to color B and purl back. Turn.
Next row, sl1 as if to purl, k1, sl1, k1 across. Turn.
Change to color C and purl back. Turn.
Next row, sl1, k1 across.

Repeat these 4 rows, changing colors every two rows, or as you choose, until the heel flap measures about 3 inches and ending in color C.


Now you're ready to...ta dah!...TURN THE HEEL!


We'll be using the short row technique, which is how most Americans I know learned to turn their first heel. Relax, it's easy. I'll give you a recipe just in case you've been dreading this part.
Change to color B and purl across 14 sts. p2tog, p1, turn. You'll be turning the work before you reach the end, leaving some sts. unworked--7 of them to be exact.

Sl1, k5, ssk, k1, turn. If it's easier, you can k2tog, instead of the ssk. No one but you will know the difference, I promise.

There will now be a gap between where you turned the knitting and the unworked sts. on both ends. You'll knit up to the gap, work the sts on either side of the gap together (p2tog, ssk, or k2tog), work one more st. and turn. It's easier for me to turn a heel with this in mind than having to count every time. The number of unworked sts. should decrease with every row until you run out of sts. to work. When you run out, you're done.

Sl1, p6, p2tog, p1, turn.
Sl1, k7, ssk, k1, turn.
Sl1, p8, p2tog, p1, turn.
Sl1, k9, ssk, k1, turn.
Sl1, p10, p2tog, p1, turn.
Sl1, k11, ssk, k1, turn.
Sl1, p12, p2tog, turn
Sl1, k12, ssk, turn (14 sts left on needle)


Heel turned! Congratulations!


Now rejoin color A and pick up 13 sts. along the left side of the heel flap. The right side should be facing you when you pick them up. If you aren't sure how to pick up sts. let me know and I'll send you some help. Now knit across the sts. on needle #2--remember needle #2? Don't forget to work your clock pattern. After you're finished with needle #2, pick up 13 sts. along the opposite side of the heel flap.

These picked up sts. will run vertically along the sides of the heel flap and perpendicular to the heel flap sts., so you don't want gaping holes in the knitting. Thirteen stitches is not a magic number, and it may not be enough for your heel flap. Be sure to pick up enough sts. to close any gaps and make sure you pick up the same number of sts. on both sides. I actually picked up 17 sts. on each side.


All of your needles are now back in use, but you have a rectangle with one needle holding the heel flap, one needle on each side holding the picked up sts., and needle #2 intact with its original 24 sts. With the working yarn on needle #3, knit across 7 of the sts. on the needles holding the heel flap sts. Slip the remaining 7 sts. onto needle #1.


You're back to your knitting triangle and at the starting point at the back of the heel. It's time to work the gusset.

The gusset is when you decrease your sts. back to your original count so the sock fits the contours of the foot and you can knit on down the foot.

Begin by knitting the sts. on needle #1 up to the last 3 sts. K2tog, k1.
Knit across the sts. on needle #2, remembering work the clock pattern.
On needle #3, k1, ssk, knit to end of needle. One round completed.
Knit one round plain--don't forget your clock pattern on #2.

Repeat these two rounds, continuing to decrease at the end of #1 and the beginning of #3 on every other round, until 24 total sts. remain--12 sts. on needles #1 and #3, and 24 sts. on needle #2. When you're done, you'll see that you've inserted an enormous bump in an otherwise neat and tidy tube. Don't forget to work the clock pattern throughout.

So, is it obvious that I've forgotten to work my clock pattern more than once? If you forget and end up with the clock stopping at the ankle, who's going to tell you that you didn't plan it that way? If you make a mistake once, you fix it. If you make it twice, you say a few nasty words while you fix it. If you make the same mistake three times, it becomes a design element. AND, if you make a mistake and don't know it until after you've knitted 12 rounds, it STILL becomes a design element. I'm the lord of my knitting, right?

Well, it's all down hill now. Knit down the foot (remembering the clock pattern, of course) until you're 2 inches short of the desired foot length.

We'll finish the toe next time!! Maybe you'll leave the toes off so you can wear your flip flops with them, eh? As always, if you're fast, you can always work on that second sock. They match better when they're worked as close to the same time as possible. The techniques for using long circular needles to do two socks at once are brilliant and make nearly perfectly matching socks. I just prefer the old fashioned way, I guess. See you in a few days!!

Friday, July 11, 2008

More Stuff From a Very Hot Farm

It's 102F today. Whew! We got the chores done early and ran to the house where we've been hunkered down in the air conditioning. The irrigation water will run all on its own until it cools off this evening and the animals all have plenty of shade and water, so we're fiddling with our own little projects.

Yesterday, a nice thunderstorm rolled in around 3:00. We're hoping for the same today.

Did I mention that I'm spinning dog hair for a woman from the Boulder area? She's saved the hair from her four dogs for 13 years. I'm working on just over 8 ounces of Golden Retriever undercoat and will start on a blend of black standard poodle and black alpaca next week. There is also a white poodle and something called a labradoodle (?). Interesting stuff. It's coming along well, but the stink--even after washing--is something else. It all smells like old dog, which will probably be a great comfort to the owner, but is just stinky to me. The black poodle died just after I collected the hair from the owner, so she's looking forward to having something from that animal. I don't blame her. I'm pretty attached to my animals as well.

My Abby is again creating cupcakes and cookies with her decorating skills and once again I'm impressed with this youngster's ability and eye. She worked with a recipe this time instead of just a boxed mix, so they taste good this time.


This is the latest bear in our growing collection. It's turned out to be a girl. Since I haven't gotten around to knitting any clothes for it, we used my daughter's doll clothes to cover the "bearness". No name for it yet, as it's gender could change with a simple change of garb. This one is made of handspun alpaca mohair blend, silver gray alpaca, and some bits of gray angora bunny. The ears and paws should fuzz up significantly with time and handling. However, I think it's time for something a little more traditional in the bear department. Jean Greenhowe has some very nice bear patterns and so does Debbie Bliss. I'll start there.


The summer cold finally caught me. The rest of the family had it last week as I gloated over being more hardy and vigorous than they. I've been fighting with a sore throat for three days, although I wouldn't admit it was actually sore--just a little tight is all--and today I have the running nose, slight fever and puffy eyes. Yuck. I hate that feeling when you're not sleepy, but your eyes and head say to lay down and sleep. As I lay there, my mind says, "The windows need washed. The weeds need sprayed. The website needs updated. The floors need scrubbing. What about the painting project? When are you going to clean the carpets? Weren't you going to sort through the storage shed?" Oh my. Why can't I remember all those things when I'm feeling good?

It's a good thing it's HOT today and I have a good excuse to give myself to neglecting all of those things, eh?

Saturday, April 5, 2008

The Quirky Bear


This is Goober. He's our latest addition in the quest for a use for scratchy yarn and the ever rowing yarn stash.


He was made using some handspun leftovers from Gandalf's light rose gray fleece. Goober's pattern came from Claire Garland's book, "Knitted Bears."


While his body is made of handspun alpaca, his little red overalls are made from some leftover wool sock yarn, and yes, they are knit in the round.


My daughter thinks he need a nice pair of striped socks or knitted shoes, but I kind of like him


in his "bear" feet--pun totally intended!

Monday, March 24, 2008

Change of plan


Well..."the best laid schemes of mice and men often go awry." At least I'm not alone in this.

My oh so carefully planned sweater already has experienced a set back. The pattern and gauge are fine, the knitting is going along very well, and I like the look of it very much, but there's a problem. The yarn that felt soft and lovely in the skein, knits up into a fabric that is scratchy against the skin. I was going to continue on as if nothing was wrong, but then I had to ask myself if I would actually wear a sweater that felt like that. With a resounding "No!" going through my mind, I'm ripping it out today. Thankfully, I didn't wait until I was half way up the body before deciding to change yarn.

I'm nearly sick as I think about it. All that handspun yarn, all the experimentation and planning...well, welcome to my world. Sometimes it seems like I spend more time ripping back than actually moving forward with a project. I have loads of black alpaca and some charcoal unspun Icelandic wool that would go together nicely if I change the gauge and some of the pattern elements, but I'm really saving that for another hooded jacket. Hmmmm.... Today looks like a day to search through my yarn inventory for about 2000 yards of...something...something plain that will show off the pattern stitches. I have lots of painted yarns, but I don't like to combine knit/purl stitch patterns with elaborate color because I think you lose the effect of both elements. Less is more, you know.

So what to do with the white handspun? I'm remembering how I already wrote about jumping on the bandwagon of making little crocheted toys and that's been fun--really fun. I suppose that I now have yards and yards of white handspun yarn that can be turned into little toys and dyed to my own taste. If I double the yarn and use a bigger hook, I can probably felt them as well. With the mohair in the yarn, the felted pieces will become furry and fuzzy. Just the thing for stuffed animal toys, so all is not lost. I also have a teddy bear book that I've never really taken seriously. Maybe there's a silver lining out there somewhere?

On a happier note, the rose gray jacket is ready to assemble. I'm going shopping this week for polar fleece with which to line it and for some really great buttons. I expect to have to spend as much as $2 per button to get what I want and I'll need eight of them. Ouch!

On an even happier note, the Easter snow storm has melted away already and it's looking a little more like spring. The first two yellow crocuses just poked their heads up, so there's hope for warmth and green that will end what feels to me like the longest winter on record. While I was walking yesterday, I noticed that the trees were just beginning to bud. The sea gulls were following the tractor through the field as the farmer was discing it up, so there must be insects and such stirring in the ground. All the signs of spring are there, but it has yet to spring!

With warmer weather comes major cleaning of livestock pens, a huge mucking out of the barns, irrigation, and shearing. There will have to be a large renovation effort to repair the damage that the freezing wind has done on several fronts during the winter--sagging wind breaks, loose boards here and there, posts broken off in the frozen ground, and such. I'm looking forward to it this year. Just to have winter say goodbye for a while will be worth it.

Well, off to rip! With the prospect of spring, ripping out that sweater doesn't seem so bad!

Tuesday, March 11, 2008

Jumping on the Bandwagon??

The latest craze in the knit/crochet world is amigurumi. In Japanese, it means small knitted or crocheted toys. I think it's a requirement for them to be cute and easy to make in order to be considered amigurumi.

I went looking on the internet to see what I could find, and do you know that there are thousands of sites that feature nothing but these cute little critters? I had no idea. There are even sites dedicated to "monster" amigurumi creations. Go figure...

It seemed silly to pass up the opportunity to make some toys while they're in vogue, so here are my first attempts at making these adorable little guys. I'm not very adept at crochet, so they weren't quite as easy at first as the websites say they are, but I got the hang of it pretty fast. My biggest problem is making the faces. Embroidery and cross stitch baffle me to no end, so while the actual toy only took a few hours to complete, it took me 2 days to get the face on so it didn't look horrifying--another learning experience and another huge learning curve.

I started with the free patterns on the Lion Brand website, but there are hundreds of free patterns out there. The first one I made is a lion--just in case you can't tell what it's supposed to be. He actually looks more like a pop tart than an animal, but the fuzzy head helps his looks tremendously. I had trouble keeping track of my rounds and counting, so he's got one leg shorter than the other and one arm that's too fat. Oh well, forge onwards and upwards.


The second one is a bunny and I really hope that it's self-evident. I did a better job of counting and keeping the stitches in order. I like this one much more and I'm encouraged to continue on, even though it looks a little like it's showing signs of male pattern baldness with the placement of the ears. My daughter Abby is making a ducky that's going to be great and I'm working on a blue androgynous and nonspecific animal guy. We'll see what happens...


So here we are jumping on the bandwagon, but hey, everybody's doin' it!

Friday, January 18, 2008

A New Recipe with a Dash Update


It's 11 F (-11 C) today and light snow is just starting to fall. Oh look, can you see Dash? He's peeking over the fence to see who's coming out to impose on his day and he's not even wearing his blankie. His mama (the big white girl) is letting him nurse now, after two weeks of spitting him off and generally treating him like an annoying stranger after his illness. I don't know if there's any milk left for him to have, but I don't think it matters. He's done so much better than either the vet or I expected, although he's really small and the weight gain is painfully slow. The gray baby is a full two months younger than he is and has had a growth spurt over Christmas. She makes him look like a squirt.

I just have to post a new recipe that I tried out. I found it in a book called "Soup and Bread", by Crescent Dragonwagon. I thought the author's name was a little strange, but the book is marvelous. With it being the frozen days of winter here, I was glad to find a book dedicated to two of my favorite types of winter foods and without a lot of the odd ingredients that are so fashionable, expensive and hard to find like kombu, daikon, kuzu, mahimahi, seitan, among many others--I don't even know what most of these are and doubt that my family would eat them even if I did. This book offers pure home cooking with some healthy and flavorful twists and I just love it.

My current favorite is called Supreme of Chicken and Olive Soup. I had never heard of putting olives in soup before and it sounded intriguing so I took the chance of my family refusing to eat a bite of it and wasting all the good ingredients. Results? Everyone loved it and it's now on our favorite list. I served it with hot baking powder biscuits and cold green salad.

So here is it is for your consideration and use. Enjoy!

Supreme of Chicken and Olive Soup Eureka

4 c. chicken or vegetable stock
1 c. dry white wine
4 tbsp butter
1 medium onion, diced
1 medium carrot, peeled and diced
1 rib celery diced
5 tbsp flour
1/2 c. peas
1 1/2 c. milk or half and half
1/2 c. cooked rice
1/4 c. pitted olives cut into fat rounds
1/4 c. pimento stuffed green olives, sliced into fat rounds
3 c. chunked cooked chicken
Salt and fresh ground pepper to taste

1. In a soup pot, combine the chicken stock and wine and boil. Turn down heat and simmer.
2. In a skillet, melt the butter over medium heat. Add the onion and saute until slightly softened. Add the carrot and and celery and saute, stirring, another 5 or 6 minutes.
3. Sprinkle the veg with flour and lower heat. Cook 2 minutes while stirring in the flour. Gradually stir in some of the stock mixture and then whisk in the thickened pan contents to the remainder of the stock. Simmer over very low heat for 20 minutes.
4. Add milk to soup. Add the peas along with the olives, rice, and chicken. Heat through and season to taste.

Pretty simple and basic--mostly just a home made cream of chicken soup. I used 2% milk and left out the peas (because my oldest son won't touch them) and added nearly three times the amount of olives. I also boiled the chicken and used the stock from that rather than purchasing actual chicken stock. Good luck and I hope you like this as much as we did.

Saturday, January 12, 2008

Back to Work


It's been a long Christmas and New Year's season. We turned out reams of gloves, socks and hats in a short amount of time and I've taken a couple of weeks to let my eye sight return to normal. In that short break, my thoughts have turned to weaving.

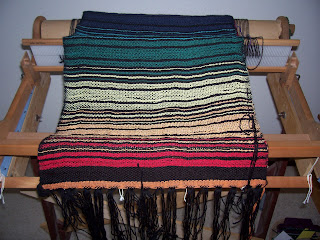
My mother left a four-harness loom when she passed on. It actually belongs to my sister in Peru, but it's much too bulky to pack off to South America, so here it remains. I'm not a good weaver in any sense, as I think that looms are too complicated, not portable enough and just too time intensive. So why would I think about weaving now? I'm not sure, but it's consuming my thoughts, even in my sleep. I have a rigid heddle loom that I work on sometimes, and I like that for making purses, ponchos and wraps, but invariably, I end up with an odd project that ends up sitting unfinished on the loom for what seems like ages (while I pursue knitting and felting ventures) and I don't really have the heart to cut it off and start something else after all the time it took to warp the silly thing to begin with. It's not just a matter of unraveling and salvaging the yarn for another project, as with knitting. I will lose loads of yarn if I don't finish, so there it sits and what to do?

I'm in the process of making weaving cards. Card weaving is used to weave bands and belts, mostly. That will fit in fine with the knitting and felting that we already do, used as hat bands, purse straps, edgings, embellishments and belts. It's portable, cheap, and suited to small projects if I read the information correctly. I'm making my cards out of an old deck of playing cards that has lost some of its members. I have 44 cards in all and I think that should be enough for my purposes and for the rest of my life. I can make bands on my rigid heddle as well, so I'm hoping my youngest daughter will be interested in the card weaving. She can make friendship bracelets with them and she's very "into" that right now. She received one as a Christmas gift that had flower beads sewn on after the weaving and it's just gorgeous--and possibly inspiring?

The knitting goes on at an even pace. I'm in the process of finding out more about online outlets for our woolens. Places like Etsy, Fiber Finds, and eBay are on the list. I'm not sure why eBay scares me, but it does. I avoid going to that site rather than doing the proper research and getting my pictures and descriptions ready. I'm still looking for more options, and even though eBay seems like a "no brainer" I just don't want to go there. Perhaps it's laziness or just fear of the unknown. I don't know.

In the meantime, I have a rose gray hooded jacket in the works and I'm charting out the designs for an Aran sweater. Along with that, I'm spinning a white lot of alpaca/mohair blend. There's really a lot of it and it looks like it's going to be a long project. I'm spinning the singles at approximately 28-30 wraps per inch with no particular project in mind.

I do have a son who would like to marry his girlfriend and I would just love to make a white handspun lace shawl in the Shetland tradition for her when they finally decide to marry and this yarn would do quite nicely for that. I've read about shawls that were made for the bride and given to her at or just before the wedding. The couple would sleep under it their first night together, the wife would wrap it around her shoulders during pregnancy, she would wrap her babies in it and use it as a cover while nursing them, it would lie as a coverlet on their bed in the warm months, she would wear it on her shoulders in the cold months, and she would be buried in it at her passing. How I would love to provide something so dear, so intimate and so lasting to my children and their spouses. Goodness, I have four children. I have a lot of work ahead of me!


Tuesday, November 13, 2007

Painting, Dipping and Dyeing

It was a warmish day today with no wind. A perfect day for dyeing yarns. We've put in some lace and fingering weights this year, hoping to move past the current fascination with bulky and chunky yarns. Alpaca and mohair are such dense fibers and are sufficiently expensive that a bulky weight is overkill--like a bulky silk or bulky weight cashmere. We're hoping that knitters will put a strand of our light and vividly colored yarn with their neutral wools and cottons.

We started with our favorites--hand paints. Our challenges this year are to be more organized and specific about how we produce a color combination so we can reproduce it, and to give names to our colorways. (I had to find out what colorway means on Yarnplayer's blog to be able to use that word...I feel kind of smart for using it now.)

In progress is the combo that we're calling "Thistle". It echoes the colors of the Canadian thistles that infest our fields and ditch banks. It's a hideous weed with spikes and stickers, but it's a very pretty weed when in bloom, just before I spray it and kill it with 2-4-D. It's shown hanging to dry alongside some solid colored lilac yarn.

My daughter put together some nice combinations as well, using pinks and raspberry colors along with some yellow and orange here and there. We've named one "Autumn Sunset" and the other "Passion Punch", named after her favorite flavor of sherbet. She made it by splattering the yarn with color. She also splattered the walls, curtains and floor in my wool barn, so "Passion Punch" will be with us for a long, long time.

We also did some solids we named "Bubble Gum" and "Red Hot". My sister Cookie, painted one that we're calling "Tutti Fruitti" by splattering red, orange and teal on white yarn in quite a controlled fashion and completely avoiding the walls. We thought we may have to overdye the batch because it looked a little odd, but after steaming, it turned out really good. We have another day planned tomorrow to work on greens and blues.

I read in a magazine about using a knitting machine to quickly knit a "blank" of undyed yarn and then hand paint it to create a non-repeating yarn. I tried that for the first time last year and liked the results, but I used one color that didn't mesh with the rest of the color progression. I tried a small sample again today and I'm excited to do more. I used a white yarn and progressively dyed from red to orange to yellow. Because the yarn is already knitted, when it's dry, I'll unravel it, skein it and it will be fabulous as a non-repeater against a black or perhaps brown background. The color blocks will be yards long, rather than inches or feet long. I'd like to do some autumn colors this way and knit some garments with leaf patterns and perhaps some twining cables to imitate the fall foliage. Muted greens, oranges, yellows, browns and reds...I'm actually salivating.

The wind has come up since we came in and it's getting cold quickly. We'll see how we fare tomorrow. After I post good pictures of dye lots I'll need loads of help putting names with them.

Just a quick shot at the very end of our little helpers. Mr. Alf, the guard cat turned nurse maid, was looking after the little ones this afternoon. Cheeseman was kicked out of the barn for disturbing the peace. "Passion Punch" footprints tell the tale.